How to Prepare Walls for Painting: The Complete Decorator's Guide
Proper wall preparation is the secret to a flawless paint finish. Here's the step-by-step process professional decorators use to prep walls for painting.
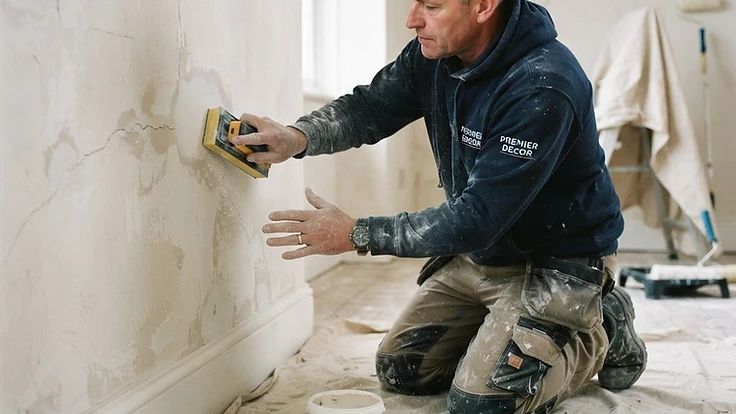
Preparation Is 80% of the Job
Ask any experienced decorator and they'll tell you the same thing: a great paint finish is 80% preparation and 20% painting. Skip the prep and even the most expensive paint will look rough, peel prematurely, and need redoing within months.
Here's the step-by-step process professional decorators use to prepare walls for a flawless, long-lasting finish.
Step 1: Clear and Protect the Room
Before you touch a tool, clear the room as much as possible. Move furniture to the centre and cover it with dust sheets. Remove pictures, fixtures, and fittings from the walls. Take off socket and switch covers (turn off the power first).
Lay dust sheets on the floor — canvas is better than plastic because it absorbs spills rather than spreading them. Tape the edges down to prevent trips.
Step 2: Assess the Wall Condition
Not all walls need the same prep. Assess what you're dealing with:
- New plaster: Needs a mist coat (diluted emulsion) before painting
- Previously painted, good condition: Light clean and sand
- Previously painted, poor condition: Strip loose paint, fill, sand
- Wallpapered: Strip completely — never paint over wallpaper
- Water stains or mould: Treat the cause, then stain-block
Step 3: Clean the Walls
Dirt, grease, and grime prevent paint from adhering properly. Wash the walls with sugar soap and a sponge, working from the bottom up to avoid streaking. Pay extra attention to kitchens (grease), bathrooms (mould), and areas near light switches and doors (finger marks).
Rinse with clean water and allow the walls to dry completely before moving on. Painting over damp walls is the most common cause of paint failure.
Step 4: Strip Loose and Flaking Paint
Run a scraper over the wall and remove any paint that's loose, flaking, or bubbling. You don't need to strip back to bare plaster — just remove anything that isn't sound and firmly attached.
Sand the edges of the remaining paint to blend them into the wall. You want a smooth transition with no obvious lip where old paint meets bare plaster.
Step 5: Fill Cracks, Holes, and Defects
This is where most DIYers cut corners and most professionals earn their money. Fill every crack, nail hole, and defect:
- Hairline cracks: Widen slightly with a scraper, then fill with a flexible filler
- Nail holes and small defects: Use a ready-mixed filler
- Larger holes: Use a powder filler built up in layers, or a repair patch for very large holes
- Gap between skirting and wall: Use caulk, not filler — it's flexible and won't crack
Overfill slightly, then sand flush once dry. A well-filled wall is invisible under paint — a poorly filled wall shows through every coat.
Step 6: Sand the Walls
Sanding creates a key for the new paint to adhere to. Use a medium-grade sandpaper (120–150 grit) for previously painted walls, and a finer grade (180–220 grit) for the final pass.
Sand the whole wall lightly — you're not removing the old paint, just dulling the sheen and smoothing the surface. Pay extra attention to filled areas and the edges of old paint.
Wipe down with a damp cloth or tack cloth to remove all dust. Dust under paint shows as rough spots and prevents adhesion.
Step 7: Prime Where Needed
Not every wall needs primer, but these situations do:
- Bare plaster: A mist coat of diluted emulsion (10% water) as a primer
- Bare filler: Prime filled areas to prevent them showing through
- Water stains: Use a stain-blocking primer to prevent the stain bleeding through
- Dark colour to light: Use a tinted primer in the direction of the topcoat
- Glossy surfaces: Prime with an adhesion primer after sanding
Step 8: Caulk the Gaps
The gap between the skirting board and the wall, and between the architrave and the wall, is the most overlooked detail in decorating. Fill it with decorator's caulk for a clean, professional finish.
Run a smooth bead of caulk along the gap, then smooth with a wet finger or a caulk smoother. Wipe away excess with a damp cloth. Once dry, paint over it — the caulk blends seamlessly into the wall and woodwork.
Step 9: Final Check
Before you open a tin of paint, do a final inspection:
- Run your hand over the wall — it should feel smooth and uniform
- Check for any unfilled defects in raking light (shine a torch along the wall)
- Confirm the walls are clean and dust-free
- Ensure all primer is fully dry
Only when the wall is properly prepared should you start painting. The time you spend on prep is repaid in a finish that looks better, lasts longer, and needs fewer coats.
How Long Should Preparation Take?
For a typical room in reasonable condition, expect to spend as long on preparation as on painting — sometimes longer. A room that takes a day to paint might need a day of prep first.
This is why so many decorators underquote: they forget to price the prep time. When you quote, always include preparation in your labour estimate. Trade Assist's quote builder lets you specify the surface condition (Good, Fair, Poor, or Bare) and automatically adjusts the labour estimate to account for the prep required.
The Professional's Secret
Clients never see the preparation — they only see the finish. But the finish is entirely determined by the preparation. Cut corners on prep and you'll be back fixing problems within months. Do it properly and your work will look better, last longer, and generate the referrals that keep your business busy.